Realtime Photo Sharing: Flickr Photo Session

This is a guest post by Jason Gabriele. Jason is a developer from the Yahoo! Mobile Platform/CPG team, who has worked in the mobile space for years developing on devices ranging from a Motorola V3 flip phone to modern devices like the iPhone. Over the past few months, his focus has been on the Photo Session project working mostly on the frontend UI.

Photo Session started as a Hack Day project by Iain Huxley. The idea came from the desire to share and discuss photos live with friends, like being able to share photos from a recent vacation with his mother in Australia. He then created a demo which could provide realtime photo viewing synced across multiple users located anywhere in the world. At a Yahoo! Hack Day event, Photo Session was selected as a winner and Iain was awarded a Yahoo-branded beach towel. Later, the project evolved into a Flickr photo sharing project with chat provided by Yahoo! Messenger.

Photo Session

Photo Session allows you to share photos in realtime with your friends. You can slide through photos, draw on them, zoom in and out, and send messages with others present in the session using the built-in chat window. Users without Flickr accounts can still join as guests but can’t use certain features like the drawing tool or chat. Given the requirement to allow guest participants, we had to limit the photos to publicly-accessible photos only for the first release.

The Basics

  • Create a Photo Session by visiting a set or photo stream and clicking on “Start a Photo Session” under the share menu
  • Once in the photo session, advance through photos by clicking and dragging or using the arrow buttons (desktop only)
  • Start drawing mode by clicking the pencil icon (must be logged into Flickr) and begin drawing on the photo. Your drawing will be shared with others in the session but will be cleared as soon as drawing mode is disabled
  • Zoom in by using the +/- buttons or using the scroll wheel on the desktop, or by pinch-zooming on the iPhone and iPad
  • You can view details about the photo using the Information icon in the lower-left on desktop browsers, or by clicking the “i” icon in the lower-right on the iPhone
  • You can leave the group at any time and browse on your own using the “Browse on your own” button (not available on the iPhone). Return to the group session by simply clicking the button again
  • You can hide the Photo Session toolbars by doing a single click on the current photo. Click again to bring them back

Browser Support

Since the primary use of Photo Session is sharing photos, we wanted to make sure the experience felt fast and responsive. This meant we would need to use features like CSS transforms and other CSS3 properties only available in the latest browsers. We also needed the rendering to be fast enough to support users rapidly advancing through photos. We decided to support Chrome, Firefox, IE9, Safari and iOS for our first launch. This would also simplify the QA process. We plan on adding support for Android in the future.

Future

Photo Session is in preview mode, so we may change features in the future depending on how people use them. We already have plans for some new features, but we would still love to hear from you so please provide feedback in the Flickr forums. We hope Photo Session makes sharing photos with your family and friends a more social and interactive experience!

Creating an interface for geofences

When we began prototyping geofences, our goal was to encourage people to geotag more photos without having to be too concerned about privacy.

Introducing people to geofences

The term “geofence” may sound complicated, but our implementation is quite simple. A geofence is a user-defined boundary around a specific area on a map. We decided to keep the creation and editing process similar to geotagging on the photo page. We understand from developing the photo page map that it is important to provide a way to search for a location as well as simply drop something in the right place on the map. The geofence is represented by a selector-circle on a modal map panel with simple edit controls on the side.

selector-circle

In previous map interfaces we used canvas elements to generate scalable components like our new selector-circle. One example of this would be the location circle in photos nearby. Our resident browser performance task-master, Scott Schiller, decided this time to compare the performance of continuing to use canvas with that of the now widely supported css border-radius feature. Using border-radius made for a smoother performing interface in our tests against the early prototypes of geofences. We loved the result.

The only noticeable downside to our current implementation is that it attaches a click handler to the entire element which is displayed as a selector-circle with css. This means that the actual click-able area is not a circle at all, it is a square.

box around selector-circle

We are currently working to find the most elegant way to get around this issue. The code below shows one possible solution:

var root_node   = Y.one('#circle_container_node'),
    circle_node = root_node.one('.selector-circle');

function getCenterPoint() {
	var half_node_width = circle_node.get('offsetWidth')/2;
	
	return [(circle_node.getX()+half_node_width),(circle_node.getY()+half_node_width)];
}

function getDistanceFromCentroid(xy) {
	
	var centroid_point = getCenterPoint();

	return Math.sqrt(Math.round(Math.pow(centroid_point[0]-xy[0], 2.0)) + Math.round(Math.pow(centroid_point[1]-xy[1], 2.0)));
}

circle_node.on('click',function(e){
	
	if(getDistanceFromCentroid([e.pageX,e.pageY]) < half_node_width) {
		//handle
	}
	
});

Sustainably supporting a sill relevant, but older browser

Don’t you still have a fair amount of users on IE7, which does not support border radius? Yes, we do, and thanks for pointing that out so eloquently. We decided to use the CSS3PIE framework which uses clever tricks to make IE7 support modern css features like border-radius, box-shadow, border-image, multiple background images and linear-gradient as background image. What is awesome about using CSS3PIE, is that it allows us to give IE7 users a nearly identical experience as that enjoyed by modern browser users without a lot of branched code.

.selector-circle {
	border:solid 8px rgba(68, 68, 68, .4);
	background-color:rgba(0, 100, 220, .5);
	border-radius: 999px;
        /*Neeed for CSSPIE to support rgba*/
        -pie-background:rgba(0, 100, 220, .5);
}

Relative sizing

We determined a sensible size range of 50 to 10,000 meters for a geofence, then dreamt up a few ways to allow folks to select an appropriate size within this range on the map. A lot of people (myself included) are not very good at judging distance in kilometers or miles without a visual example. We establish a connection between changing to the radius dropdown menu, the size of the selector-circle, and the zoom level of the map by making sure that a change to one is reflected in all of them.

Zoom level of map in relation to the size of the selector-circle

Something had to be done to keep the geofence visible on the map even if the selector-circle has become too small to be seen in a selected zoom level. The selector-circle was given a center-point which would not change with changes of radius or zoom. It is always visible even if the surrounding fence is too small

Geofences are privacy defaults, not filters

A geofence is only applied as a default to at the time of uploading or geotagging a photo. It will not, on it’s own, affect photos already in that area. We created a process which one could follow to apply geofences to existing photos as a convenience. Nolan Caudill goes into detail about the code behind this process in his post from last week. Now, imagine if you did not realize that a large number of your photos, which you intended to stay public were in an area covered by a geofence. After applying the geofence settings, they would be suddenly hidden from the map. Changing all of those photos individually or even as a batch in the organizr would be, what we in the industry call, a massive honking bummer. A final step was added to the end of the creation and edit of geofences to show which photos could be affected. We display a list of potentially affected photos with a color-coded indicators of what their privacy will be after the geofence settings are applied to help people to make as informed a choice as possible.

Existing photo apply panel

In most cases you will get an idea of which photos will be affected right away, but areas with lots of photos can be carefully assessed as well.

Showing all of the fences at once

In the prototype phase, geofences were displayed in a list and the only way to see them on a map was individually. We decided to create a map which displays all of the circles, in one place, over the list, to make it easier to see how fences might interact. One great example is that if two fences of similar privacy value (like family and friends for instance) overlap, the intersecting area is considered private. With this in mind, it is nice to at least be able to see on the map where your fences cross. In some later release, we would love to show an appropriate red color-code in these intersecting areas.

Most people will create geofences with names like Home, Office, and School. For most people, these places are pretty close to each other. Some people might have places which they want to protect and are further apart. It is important for the map flexible enough to include the entire globe if you were to have one or two geofences abroad. We use a center-point to represent geofences which are too small to be seen, and we calculate the best zoom and center of the map when we load of the geo preferences page.

World view

The world view of the map

Neighborhood view

The neighborhood view of the map

The Code Behind Geofences

We launched geofences earlier this week. I want to give you a glimpse into some of the code that runs the feature.

Geofences are defined by three things: a coordinate pair, a radius, and a privacy level. We store the coordinates (ie, decimal latitude/longitude) in our database as integers, the radius as an integer representing meters, and the privacy level as an integer that maps to a constant in our code.

When an image is geotagged, we have to determine which geofences the point falls within. We do some complex privacy calculations that Trevor talks about in his introductory post.

First, we fetch all of your geofences from the database and then loop through each one, determining if the photo falls in any geofences. We limit the number of geofences you can create to ten, so running a point through 10 calculations is not that expensive.

We use the great-circle distance formula to figure out how far the image is from the center of a geofence. If this distance is less than the radius of the geofence, the geofence applies.

European detail map of Flickr and Twitter locations

MySQL is a Great Hammer

When you create a geofence and want to apply it to existing photos, the backfill is a more involved process. In order to grab just the photos we care about for a geofence, we have to limit the number of photos that we select due to performance.

As mentioned, we store the latitude and longitude as integers in MySQL. Since radial queries are next to impossible with this setup, we do a first pass with a bounding box formula that encompasses the geofence and then use our great-circle distance formula to cull the photos that don’t fall in the geofence.

The bounding box formula we use takes into consideration geographic gotchas, like the poles and the 180 degree discontinuity (ie, the International Date Line). Since a geofence could overlap the International Date Line, we have to modify the DB query in doing the longitude part of our query since doing a simple BETWEEN won’t work. When the bounding box doesn’t cross the IDL, we can do “SELECT id FROM Table WHERE longitude BETWEEN $lon1 and $lon2” and when it does we do a “SELECT id FROM Table WHERE longitude < $west_lon AND longitude > $east_lon”.

In short, we use a query that MySQL is a good at it to limit our initial dataset and then use a little post-processesing of the data to get the points we actually care about for the geofence.

After we have this bundle of photos that the geofence backfill applies to, we then run our normal geoprivacy calculations, lowering the privacy if the combination of fences calls for it.

Concurrency, or the world keeps turning

The introduction of the geofences backfill pane also introduced some concurrency issues, which were fun to deal with.

The contract that we wanted to create for the user was that the calculated privacy that they saw in the preview pane for the backfill would exactly match the result of running the backfill. This seemed intuitive but the implementation was tricky.

There are two things that can affect a photo’s geoprivacy: the user’s default privacy and the geofences that exist. These things can change through time, that is between the time that a user hits ‘apply’ on the preview pane and when the backfill finishes running.

Whenever you deal with mutable state through the lifetime of a process, you have to change how you treat this state. Who can modify it? What can they modify? And what processes see this updated object?

The easiest way to deal with mutable state is to make it immutable. We do this by storing the state of the user’s geoprivacy world (that is, the default geoprivacy and the geofences) alongside the backfill task, so that when the task runs it uses this state instead of querying the DB, which is mutable, possibly having changed since the user hit the ‘apply’ button.

Storing this state ensures that regardless of how the user modifies their geoprivacy settings, the result of the backfill will match exactly what they saw in the preview pane, providing a consistent view of the world.

We also added the restriction of only allowing one backfill task per user to be running at a time, which simplified our bookeeping, our mental model of the problem, and the user’s expecation of what happens.

Lessons Learned

Geo, by itself, is not easy. The math is complex (especially for someone like me a few years out of school). Privacy is even harder. Since the project evolved quite a bit while we were building it, having a large amount of automated testing around the privacy rules gave us the confidence that we could go forward with new privacy demands without introducing bad stuff into code that was “done”. We learned to give ourselves plenty of time to get all this stuff right, since geo has so many edge cases and violating privacy is an absolute no-no.

During the project, we had to keep balance between our users’ privacy and their expectations, all while keeping a complex and new feature understandable and even fun to play with. The only way we could do this was being open and honest between engineering, design and the product team about what we were building. This was a total team effort from Flickr, and we’re very proud of the end result and the control that it gives our users over their presence on the Internet.

Also, if you’re interested in working on fun projects like this one, we’re hiring!

Engage Kitten Hose

REAL-TIME KITTENS!!!!

A little while ago we released some new API methods that enabled real-time updates for new photo uploads to be pushed out via a PubSub-like subscription system. Initially you could only subscribe to photos from your contacts and favorites from your contacts. Which was pretty neat, but that barely scratches the surface of stuff that happens on Flickr that people might be interested in. So we added some more stuff to subscribe to. Calling flickr.push.getTopics now gets you:

<rsp stat="ok">
  <topics>
    <topic name="contacts_photos" display_name="photos from your contacts" />
    <topic name="contacts_faves" display_name="favorites from your contacts" />
    <topic name="photos_of_contacts" display_name="photos of your contacts" />
    <topic name="photos_of_me" display_name="photos of you" />
    <topic name="my_photos" display_name="your photos" />
    <topic name="my_faves" display_name="your favorites" />
    <topic name="geo" display_name="photos from an area (geo)" />
    <topic name="commons" display_name="photos from the Flickr Commons" />
    <topic name="tags" display_name="photos with a tag (or tags)" />
  </topics>
</rsp>

The details for the extra arguments required by the new topic types are part of the flickr.push.subscribe API method documentation.

The my_photos and my_faves topic types are exactly like contacts_photos and contacts_faves, just scoped to your account. The photos_of_me and photos_of_contacts topic types create subscriptions that receive events when you or your contacts are tagged in a photo. The really interesting ones though are the next 3: commons, geo, and tags.

The Commons

Motorcyclist in Leakey, Texas, near San Antonio, 05/1973

One of the great new subscription types is for photos from the Flickr Commons. Set the topic type to commons, and set the nsids argument to a comma-separated list of NSIDs of Commons institutions you’re interested in (get them by calling flickr.push.getInstitutions) or just leave nsids empty to get all uploads and updates from the Commons.

Geo Subscriptions

37° 36' 42" N, -122° 23' 25" E

With the geo topic type you can subscribe to photos from a particular area, specified as either a set of WOE IDs (also, here), a set of Flickr Place IDs, or by a point and a radius. The radial query is the obvious choice for creating subscriptions that aren’t well-known areas, or say, user-specified by dragging a circle on a map. WOE IDs on the other hand are incredibly useful since they represent many well-known geographic features. For example, London, England: WOE ID 44418.

Or, if you’re like me and completely mad about aviation and anything that flies, there are convenient WOE IDs for airports. Go somewhere like this, grab a bunch of airport codes for interesting places, use the Y! GeoPlanet APIs or the flickr.places.find method) to resolve the airport codes into WOE IDs and put them into a comma-separated list in the woe_ids argument of flickr.push.subscribe and watch the aviation photos roll in. For example:

  • Hong Kong International, China (HKG): 24875607
  • Innsbruck Airport, Austria (INN): 12510823
  • Keflavik International Airport, Iceland (KEF): 12513445
  • Le Bourget Airport, Paris (LBG): 22137770
  • Kuala Lumpur International Airport, Malaysia (KUL): 28752278
  • etc.

Tags

Bump

We’ve also added a very basic tag subscription type. With the topic type set to tags, you can provide a comma-separated list of tag names in the tags argument of flickr.push.subscribe and receive uploads and updates from photos containing any (i.e. OR mode) of those tags. Try something like kitten,cat (We’re not responsible for your bandwidth bill). The tags you specify should be all lower-case and not contain any spaces, so if you want to match something like “Justin Bieber” you’ll need to specify “justinbieber”. Coming soon: machine tags! robots:zomg=yes

Warning: Code Alert!

In case you missed it, last month Kellan devoted a little Sunday-morning hack time to whipping up a little example of how to get started with the Flickr real-time APIs. It’s got a little bit about authentication, how to subscribe, processing a feed, and even some PHP. Thanks Kellan!

Join Us at the NYC Photo Hack Day!

Hacking audio on the iPad with @rharmes at Epicenter Cafe

Are you a developer with a great idea for a photo hack?

Are you going to be in New York on August 20th and 21st?

If so, join us at the Photo Hack Day! Our very own Paul Mison will be on hand to give a presentation on the Flickr API and to answer any questions you have while hacking. The winner will have their hack featured on the NASDAQ billboard in Times Square (among other prizes), and all participants will get a year of free Flickr Pro. Sign up to reserve your spot at the event, which will be held at General Assembly in Manhattan.

If you’re participating in the Hack Day, Flickr engineers will be available to help on IRC: #flickrapi on chat.us.freenode.net. You can also go to developer.flickr.com for more information on the API and developing with Flickr photos. We will be announcing some new and improved APIs in advance of the Hack Day, so watch this space!

Lessons Learned from the Flickr Touch Lightbox

Bye bye Kodachrome
Bye bye Kodachrome by e_pics

Recently we released the Flickr Lightbox for iPad, iPhone and Android. We managed to create a pretty responsive interface. It took us a while to get there, and we learned a lot doing it. In this post we’d like to share a few useful key lessons we took away from the project.

Get Your Viewport Tag Right

The viewport tag is actually not that well understood, but you have to get it right, or everything is just going to be completely confusing. For the lightbox it looks like this:

&lt;meta name=&quot;viewport&quot; content=&quot;width=device-width; initial-scale=1.0; maximum-scale=1.0; user-scalable=0;&quot;&gt;

This is the way we made sure that we could reliably position elements by pixel, and properly handle device rotation without fear. Other places on the web describe the details of how this tag works, but for us the most important was “maximum-scale=1”. This is because when you rotate the iphone it scales the content normally, unless you specify a max scale. Positioning becomes very difficult when the phone is scaling the interface you carefully crafted to fit on the device.

Simplify the DOM

On mobile WebKit you can use CSS for much, much more than you can on the desktop where you need to support bad browsers. This makes it very easy to clean the DOM down to the minimum. We did this on the lightbox by starting from scratch (the DOM for the desktop lightbox is quite complex to support a cross-browser layout.) We also actually nuke the existing DOM when the lightbox opens.

Keep It Responsive

I can not emphasize this enough. Of course, any UI must be responsive. But a touch UI doubly so. Apple clearly “got” this in the development of the first iPhone. Possibly because there is no “click” sound when you interact with the device it is very hard to tell if the device has registered your interaction without immediate feedback. Further, if there is even a tiny delay in how the device responds to touch interaction it feels clunky. Much clunkier than a slightly glitchy desktop UI. One of the things keep us from supporting the desktop lightbox on touch devices was that it felt very slow and clunky. Once we figured out that this was a matter of percieved responsiveness it was pretty clear where we needed to focus: percieved performance.

From a user experience standpoint this means that any interaction needs to give the user feedback. In the lightbox this means that when the user swipes the photo always moves with their finger. When the user hits the end of the photos, rather than not responding anymore, the photo continues to move but snaps back (with CSS transitions) to the last point.

Of course, for this interaction to work it needs to be very fast, any delay feels very awkward. So from an optimization standpoint we went after the performance of the swipe animation above everything else. The first thing to do is to use 3d CSS transforms. All the touch devices have 3d acceleration hardware which makes it possible to move the photo much faster than with just the CPU. The additional benefit of course is that when using transforms the animation does not block JS execution at all.

The code looks something like this:

    distance = e.touches[0].pageX - startX;
    absDistance = Math.abs(distance);
    direction = (absDistance === distance) ? 1 : -1;

    if (absDistance &amp;gt; 2) {
        thisPosition.setStyle('transform', 'translate3d('+distance+'px, 0px, 0px)');
    }

When we first tested this, however, we found performance quite disappointing. Another team pointed us to a trick: don’t use <img> tags. We got a huge performance boost when using <div> tags with the photo as a background image.

The next thing we noticed was a slight but perceptible delay between the touch event and the movement of the photo element. After some profiling we found that the YUI event abstraction was actually taking enough time to be perceptible, so we switched to native event handling. Which lead us to further optimization along the same lines: do as little as possible. Most things you do in JS (with some special exceptions) are blocking. So any work you do while touch events are being handled necessarily delays the feedback the user needs to know that their touches are being registered.

We went through the code path that happened during touch events. Anything that could wait until “touchend” was deferred there.

The last problem to solve was that the browser would crash with more than twenty or so slides loaded. It seems that the iPhone browser dies very quickly when it runs out of memory, especially when using 3d acceleration. So we implemented a simple garbage collector for the slide nodes:

    //remove all slides more than 10 positions away
    function pruneSlideNodes() {
        if (inTransition || moving) {
            if (pruneHandle &amp;amp;&amp;amp; pruneHandle.cancel) {
                pruneHandle.cancel();
            }
            pruneHandle = Y.later(500, this, pruneSlideNodes); //wait
            return;
        }
        
        positionManager.each(function (value, key) {
            if ((Math.abs(key - parseInt(currentPosition,10)) &amp;gt; 10) &amp;amp;&amp;amp; value.id) {
                
                Y.one('#' + value.id).remove();
                delete(value.id);
            }
            
        }, this);
    }

Final note:

Moving to YUI 3 has been huge for us, even on mobile tasks. The mobile lightbox takes advantage of several modules created for the desktop, most importantly a “model” module we created to manage what we call photo “contexts”. This meant that the logic of displaying slides is the same in all places, the view/controller code was all that we needed to create for this. Which also means that this logic exists in just one file.

Flickr flamily floto

Like this post? Have a love of online photography? Want to work with us? Flickr is hiring engineers, designers and product managers in our San Francisco office. Find out more at flickr.com/jobs.

Don’t be so PuSHy

You know three things that would be cool?

  • the ability to subscribe to the output of a Flickr API call in a feed aggregator
  • the ability to get the results of Flickr API calls as…

Oh wait. That was a while ago. Wouldn’t it be great if you didn’t have to poll our API over and over just to see if photos were there, only to find out you waited too long since last time and now because of the results size limits you can’t get them all and you have to figure out how many you missed and then you have to make another call with the right offset to get those results but of course in between then and now the result set changed a bit so you aren’t sure if you really got them all and…

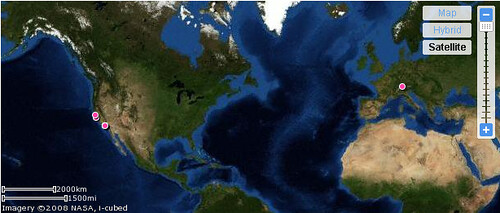
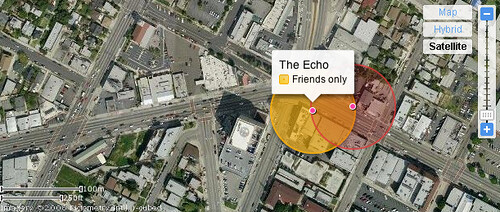
Wouldn’t it be great if Flickr had something that could just PuSH photos to you as they appeared, kind of like this?

Introducing the new (and experimental) flickr.push API methods. These allow you to subscribe to new uploads and updates from your contacts and favorites from your contacts. Let’s dive right in and see exactly how it all works:

"there is a virtuous circle in this ecosystem"

The 20,000 ft overview is basically this:

  1. You make an API call to Flickr asking to subscribe to one of several different photo feeds, providing a callback URL in the arguments.
  2. A little verification dance ensues during which we make a request to your callback URL. If you respond appropriately we’re all good and from then on…
  3. Live(-ish) updates are POSTed from Flickr to your callback URL in Atom 1.0 format.

Subscribing

The subscription system is based as closely as possible on Google’s Pubsubhubbub protocol, with a few wrinkles. One is that Flickr acts as the hub and the publisher all rolled in to one. We’re obviously not really “publishing” separate feeds of every single user’s contacts’ photos and faves to a central hub somewhere, we only create the feeds on demand when someone subscribes to them. So we couldn’t, for example, publish them all to a 3rd-party hub like Superfeedr. But the whole pubsubhubbub metaphor still works pretty well.

Another difference is that the subscription happens via an authenticated API call and not an HTTP POST; hopefully the reasons for this are obvious. We’ll get into them in detail a little bit later. But even though the mechanism for the subscription request is different we’ve tried to follow the protocol as closely as possible and keep the parameters the same. The Google PubSubHubbub Core 0.3 section on how the subscription flow works is a good place to start, and the rest of this post assumes you’ve read that and more or less understand what the interactions should be between hub and subscriber. Done? OK, here are the methods:

flickr.push.getTopics

This method just tells you what you can subscribe to. It returns something like this:

<rsp stat="ok">
  <topics>
    <topic name="contacts_photos" />
    <topic name="contacts_faves" />
  </topics>
</rsp>

yeah, yeah, you already get that part. You can currently subscribe to contacts’ photos (new uploads and updates) or contacts’ faves. So subscribe already!

flickr.push.subscribe

This method (which requires an authentication token with read permissions) takes almost exactly the same arguments as a “proper” PubSubHubbub subscribe HTTP request would. Wee differences:

topic – unlike the topic argument in the HTTP version (which is a URL), this is just one of the topic types returned by flickr.push.getTopics.

secret – currently not supported, so this parameter is omitted.

callback – this must be unique, i.e. you can’t use the same URL for more than one subscription.

Everything else works as you would expect – verification (either synchronous or asynchronous), the hub challenge string, subscription expiration/refreshing, unsubscribing (with flickr.push.unsubscribe) etc. Which brings us to:

flickr.push.getSubscriptions

This method also requires an authentication token with read permissions, and returns a list of subscriptions for the authenticated user, like so:

<rsp stat="ok">
  <subscriptions>
    <subscription topic="contacts_photos" callback="http://example.com/contacts_photos_endpoint?user=12345" pending="0" date_create="1309293755" lease_seconds="0" expiry="1309380155" verify_attempts="0" />
    <subscription topic="contacts_faves" callback="http://example.com/contacts_faves_endpoint?user=12345" pending="0" date_create="1309293785" lease_seconds="0" expiry="1309380185" verify_attempts="0" />
  </subscriptions>
</rsp>

Oh yeah, the docs:

flickr.push.subscribe
flickr.push.unsubscribe
flickr.push.getTopics
flickr.push.getSubscriptions

Feeds

The format of the feed that gets posted to your endpoint is currently limited to Atom 1.0, i.e. exactly what you’d get from something like

http://api.flickr.com/services/feeds/photos_public.gne?id=_YOUR_NSID_HERE_&format=atom

For the contacts_faves topic type it’s the same thing but with the addition of the atom:contributor element to indicate the user who faved the photo.

And that’s about it. Questions?

Privacy and Restrictions

The astute observer may notice that not all photos are being sent in the PuSH feeds. Since this is a new (and experimental) feature for Flickr, we’ve basically turned all of the privacy/safety restrictions on it up to 11, at least to start with. PuSH feeds currently only contain images that have public visibility and safe adultness level. In addition, users with their “Who can access your original image files” option set to anything other than “anyone” and users who are opted out of the API will not have their photos included in PuSH feeds.

While this may be a bit restrictive (for example since the API call is authenticated and the photos are coming from your contacts technically you should be allowed to see contacts only or friends/family photos for contacts that allow it),  we feel that since this is a new thing it’s better to start conservative and see how the feature is being used. It’s possible that we may relax some of these restrictions in the future, but for now a PuSH feed is essentially what a signed-out user could get just by grabbing the RSS feeds from various people’s photostreams.

You will also notice that for now we’ve limited the feature to pro account holders only.

So… What?

screens beget BACON!!!

So what can you do with it? There’s the obvious: any web application which currently does some kind of polling of the Flickr API to get photos for its users can potentially be altered to receive the push feeds instead. More timely updates, cheaper/simpler for the application and as it turns out cheaper for Flickr, too – it’s often easier on our servers to push out events shortly after they happen and we’ve got them (often fresh in our cache) than it is to go and dig them up when they’re asked for some time later.

Surprise!

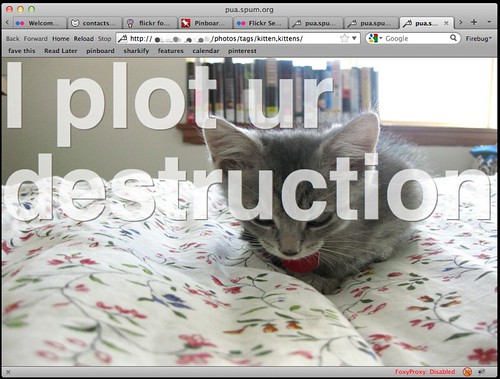
Some of the more interesting things that we hope these API methods will enable revolve around the more real-time nature of the events they expose. As an example of what’s possible in this space, Aaron Cope has created a little application he calls “Pua”. It’s a wonderfully simple way to surf Flickr without having to do much of anything; Pua takes you on a ride through your contacts’ photos and favorites, as they happen. Have a read about exactly what it is, why it’s called Pua and why he made it. If you ask nicely maybe Pua will give you an invite code.

Later

Hopefully there will be much more to come. Finer-grained controls on the subscriptions (safety levels, visibility levels, restricting to just new uploads or only certain types of updates, lightweight JSON feeds, etc.), new types of subscriptions (photos of your friends/family, photos from a particular location, photos having a particular tag, something to do with galleries…), and maybe some other stuff we haven’t thought of yet. Hey, wouldn’t it be cool if you didn’t need to run a web server on the other end to be the endpoint of the feeds?

Let us know what you’d like to see! What works, what doesn’t, what we got wrong and how to make it more useful to the people who want to Build Stuff (that’s you).

Fine Print

"there is a virtuous circle in this ecosystem"

The Flickr PuSH feeds are part of the Flickr API, and thus fall under the API Terms of Service Agreement. This means all the usual things about respecting photo owners’ copyrights and all also the other good bits about API abuse. In other words, don’t try to subscribe to all of Flickr. Trust me, we’ll notice.

Flickr now Supports OAuth 1.0a

We’re happy to announce that Flickr now supports OAuth! This is an open standard for authentication, which is now fully supported by the Flickr API. You can get started by going to our OAuth documentation. As part of this announcement, we would also like to note that the old Flickr authentication is now deprecated, and is expected to be disabled early 2012.

I'm Guarding the Door

I’m Guarding the Door by Frenck’s Photography

OAuth is very similar to the old Flickr auth in a lot of ways. You start by getting a request token (frob in the old flow), redirecting the user to the authentication page, and then getting a token which can be used to make authenticated requests. With proper OAuth support, though, you will be able to use one of the many libraries available in a variety of languages to get started.

In addition to this, we have streamlined the authentication process across desktop, mobile and web, and have simplified the user experience by removing the anti-phishing step for the Desktop flow, which is no longer necessary.

Currently, we only support OAuth 1.0a, but we have plans to eventually support OAuth 2.0. The decision was based on the fact that OAuth 2.0 is still an evolving definition that is rapidly changing.

We wanted to make the transition to OAuth seamless to the user, so we created a method to exchange an old token, with an OAuth token. The application has to simply make an authenticated request to flickr.auth.oauth.getAccessToken, which returns an OAuth auth token and signature for that user which are tied to your application. The exchange is meant to be final, so the old authentication token is scheduled to expire 24 hours after this API method is called.

Now, it’s your turn! Go read our OAuth documentation if you already have an application, or visit our developer guide for more information on how to get started. If you experience any problems, or have any questions or suggestions regarding our OAuth implementation, please post to our developer mailing list.

Refreshing The API Explorer

Most people know that Flickr has an API. As it wouldn’t be much use without documentation, we have that, too. (There’s even a list of methods and information about each available via the API itself.) What if I told you there was also a way to experiment with it from the comfort of your browser, no coding required?

Sink Explorer

Sink Explorer by Zabowski

Well, that’s what Flickr’s API Explorer offers. It’s an easy way to customise requests by filling in simple form fields, whether the method requires authentication or not, and to see the responses that are returned. It’s great for one-off prototype scripts where you quickly want to find some data, for seeing whether a method does what you think it does, or to sanity-check some code that’s not doing the right thing.

It’s been around for years, but nobody ever seems to have made much of a fuss about it. (The only mention I can find on this blog is an interview with a certain API developer singing its praises.) However, it’s needed a little attention to bring it up to date, and so I made some time to teach it a few new tricks.

Firstly, it now offers a choice of output response. While it doesn’t offer every format that the API does, the three (and a bit) available – the default XML, JSONP (or raw JSON), and PHP serialized data – should cover a lot of ground. Secondly, the Explorer pages now have proper URLs, so it’s possible to link to the API method for fetching the list of pandas, for example. Finally, for the most popular of those response types – XML and JSON(P) – responses are now pretty-printed and syntax highlighted, as are the examples in the API documentation pages for each method. That is to say, the returned values are indented and have line breaks, while the name, attributes and quoted values of the elements are coloured appropriately.

Now that you know that it exists, and that it’s all freshened up with spiffy features, why not go and play around? Have fun!

Inspiration Tuesday

When I poke my head above my monitor at FlickrHQ, I can see a lot of headphones. Ever wonder what inspires us to write code (besides fried chicken sandwiches and cocktails)? Well I did a little snooping in the playlists of a few Flickreenos:

Zack

Zack in headphones

Top Tracks:

  • Fitz & The Tantrums – MoneyGrabber
  • Ear Infections mix – Goldenchyld
  • Live In San Diego – Goldenchyld
  • Little Birdy – Brother
  • Parliament – Red Hot Mama


Ross

Ross in headphones

Top Tracks:

  • David Gray – Flame Turns Blue
  • Kings of Convenience – Singing Softly to Me
  • Grizzly Bear – Southern Point
  • The Roots – The Next Movement
  • Iron & Wine – Jezebel

Trevor

Trevor in headphones

Top Tracks:

  • Crawler – Cosmic Tide
  • Quest for Fire – Next to the Fire
  • Bison BC – Die of Devotion
  • Radiohead – Little by Little
  • DMX Krew – Do It All Nite


Scott

Scott in headphones

Top Tracks:

  • Wax Tailor – No Pity
  • Ray Charles – Eleanor Rigby
  • Steve Martin – How to Meet a Girl
  • KRS-One – MC’s Act Like They Don’t Know
  • Quantic – Snakes in the Grass


Dubious friendship

Oh, and I suppose I should share mine too:

•  Blueprint Car Crash – Gun Moll
•  Little Dragon – Come Home
•  Angus & Julia Stone – Black Crow
•  Plants and Animals – Celebration
•  of Montreal – Coquet Coquette


Find even more of what inspires us on our FlickrHQ Last.Fm Group

Photos by waferbaby